|
Home > Works in Stone |
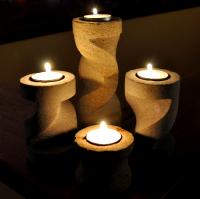
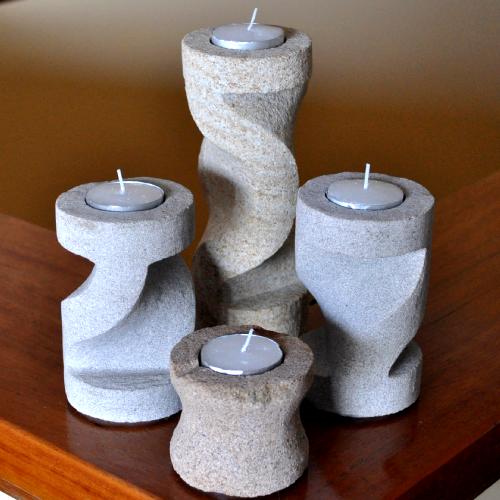
Four Piece Carved Sandstone Candle Holder Set
How I made my brother’s wedding present. |
 |
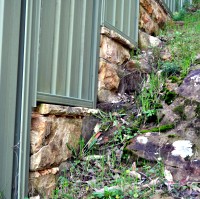
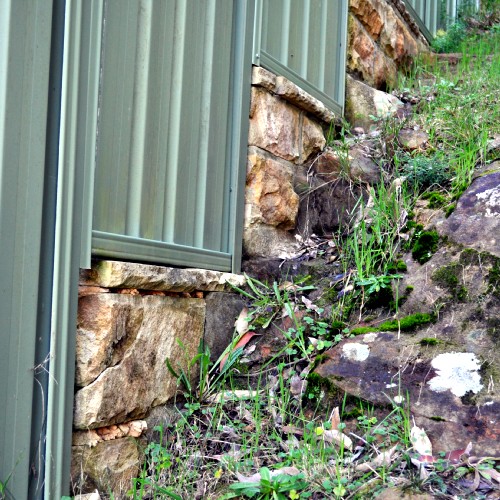
I think it was roughly one and a half years ago that a particularly windy storm went through our suburb and knocked over our fence. I didn’t realize it at the time but the act of getting it fixed would actually set the stage and allow me to craft a set of sandstone candle holders for my brother’s wedding present.
How did a fence falling over do this? Well, we live on a steep hill that is pretty much just a great big lump of solid sandstone. In order to get the fence to stand up and be strong enough to resist any further windy days the contractors had to drill a series of holes into the rock. |
|
|
Current Rating: 4.40 |

From: 5 votes
|
|
|
|
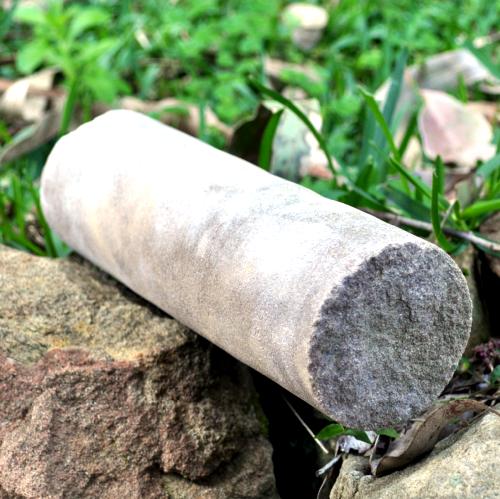
This left me with a number of nice sized round cores that I liked the look of and decided to put aside just in case.
Anyway, 18 months later my wife and I were invited to my brother’s wedding and I was thinking of what kind of gift we could give. I wanted to give something special that at the same time didn’t cost too much money. At this point I thought of the sandstone cores that I had sat in the shed and what I could do with them. Following on from the success of my last carved sandstone gift I thought I could make them something really special that would be far better than anything that could be just bought in a shop. |
 |
 |
Deciding on a Theme
The first thing to do was decide on a design. Unlike my last project, the cylindrical shape of the rock and its limited supply meant that I had to decide what I wanted to achieve before starting out. My final decision was to have a three tier, four piece set. The idea was that when lit the pieces in the lower tiers would throw pools of light onto the pieces in the tiers above thereby helping to highlight their features and shape. |
The Production
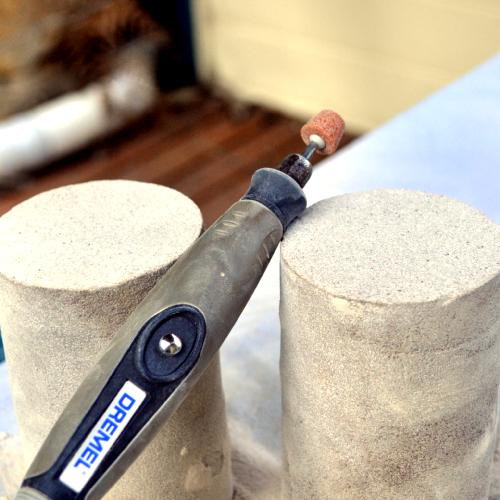
After deciding on a design the next stage is to set to work and actually turn the design into reality. The first step to achieve this was to rough cut the sandstone to the right length. This was done using nothing more than a standard $8 300mm rod saw.
Once the stone is roughly the right size, the next stage is to tidy up the ends so that they are flat. To do this I used a grinding bit with my Dremel High Speed Rotary Tool. The aim of doing this is to allow you to accurately mark out the design that is to be carved out. |
 |
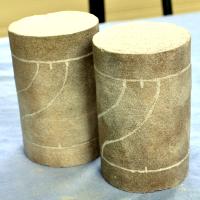 |
Next, mark out your design. To do this I used a high speed diamond bit with my Dremel but you could also use a marking pen if you have one handy.
|
After this it's time to get out the rod saw again and remove as much waste material as possible. I did this by making a series of cuts that allowed me to snap out the resulting columns of waste rock. I could theoretically have done this using a diamond blade on the Dremel but to be honest I found it easier to use the hand saw. |
 |
 |
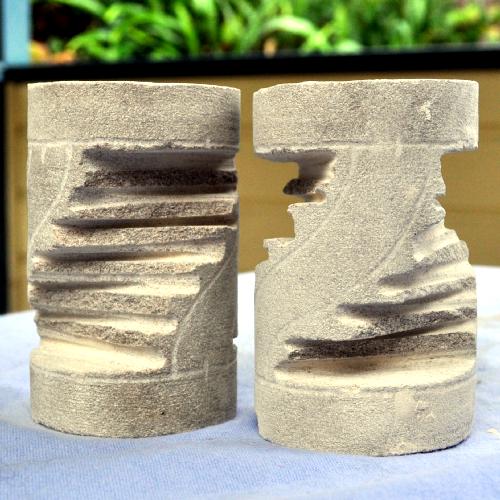
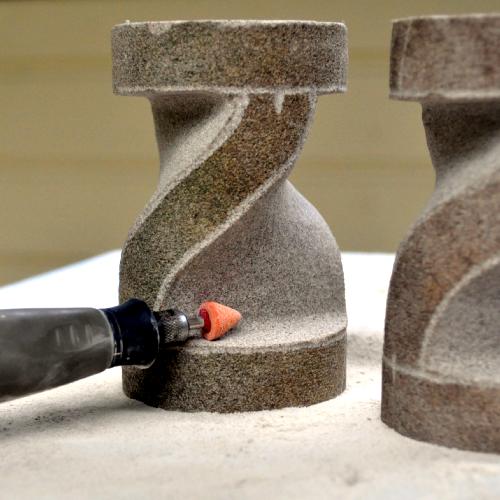
Now that the bulk of the waste material has been removed the next step is to go back to the Dremel using a course grinding wheel to tidy up the shape of the cut surfaces.
Moving on from the rough grinding, I then changed to a finer grinding stone to tidy up the surfaces and make sure all of the angles and curves were nice and smooth. |
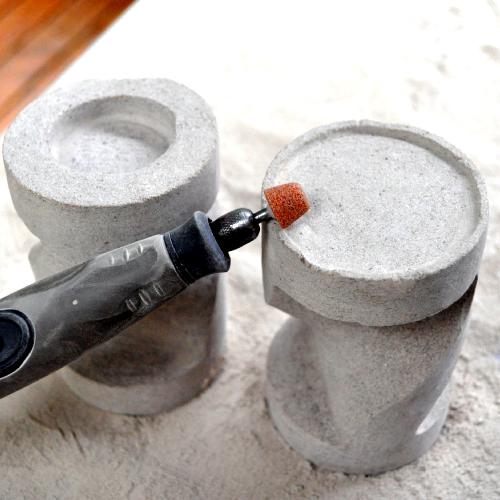
As I’d now finished work on the body of the piece, it was now time to inlay the top and bottom. The top inlay is there to hold the tea light candle and the one in the base is there to allow the addition of a felt base to protect any delicate surfaces that the piece may be sat on. To do this I started with a course grinding wheel and finished off with a fine grinding stone to ensure that all of the edges and angles were straight. |
 |
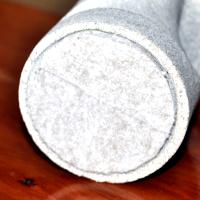 |
At this point, all that was left to do was to give the finished pieces a good wash to remove all of the remaining dust before setting them aside to dry before sticking on the felt base. The felt I used for the base was found in a local hardware shop in the floor protection section. It comes in a sheet that allows you to cut the pieces to the exact size required and has a sticky coating on one side so it’s easy to use. |
With all four pieces complete, all that remains is to find a nice box, pack them securely in it, wrap the present and wait to see how they are received.
All in all I’m very proud of how the candle holders turned out and am glad I decided to have a go at making them myself. Realistically my experience working with stone is nonexistent; this project has shown me that actually, it’s not that hard to work with and has inspired me to see what else I can make. |
 |


Current Comments
1 comments so far (post your own)i really want one would you sell them?
Posted by JoAnn on Sunday, 1.04.12 @ 15:12pm
This set is unique I'm afraid and has been given to my brother as a wedding present so I can't let you have it. I do still have some of the other pieces on the site though and can make more so if you are interested in anything else, please let me know.