|
Home > Works in Wood |
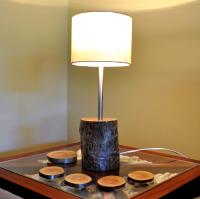
Recycled Wooden Table Lamp |
 |
There’s just something about recycling things that agrees with me. With that, I don’t just mean separating paper and plastic, I mean real tangible recycling, taking something that is broken or worn out and fixing it up to give it a new useful life.
So, to that end, this is the story behind how I recycled a broken floor lamp and a hunk of tree trunk from my garden, combined them and turned them into a beautiful wooden based table lamp for my wife instead. |
|
|
Current Rating: 4.00 |

From: 3 votes
|
|
|
|
I really don’t remember just how long ago it was when we got our old floor lamp. It was basically a long steel pole with a lamp shade on top so it was nothing special. In any case, it was broken and we weren’t that sad to see it go.
When I say broken, there was nothing electrically wrong with it. It was just the threads on the pole that had started to wear out so it wouldn’t stand up straight anymore. That’s why I was able to disassemble and reuse the light fitting safely. |
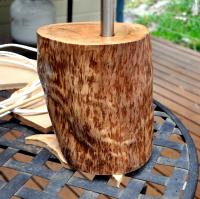
The wood for the base came from a tree in the back garden that I had to remove because it was growing at a funny angle and was getting to the point where if I didn’t take it out I would have had to pay someone to come cut it down for me. Now, I generally hate to waste anything from my garden so this seemed like a fitting use for a chunk of the tree.
So, how was it done? Well, first up I had to choose and cut out a section of the tree trunk for use as the base of the lamp. A fairly simple task, I simply used a hand saw to cut out the section. |
 |
 |
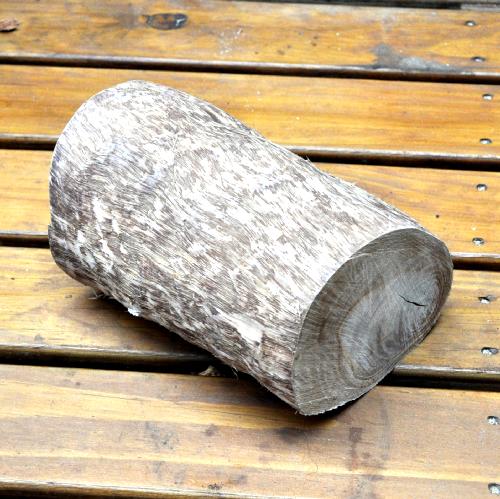
After this the fairly simple, if laborious task of removing the trees bark was carried out before using a belt sander to tidy up the two ends of the piece and make sure that they are as close to parallel as possible.
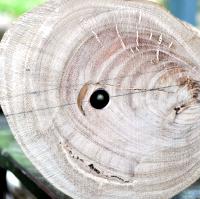
The importance of having the end cuts parallel becomes clear in this next step. Because the section of wood was longer than my longest drill and I didn’t want to go out and buy a longer one, it meant that I had to try to mark up the piece of wood so I could drill in from both ends and have the holes meet in the middle. |
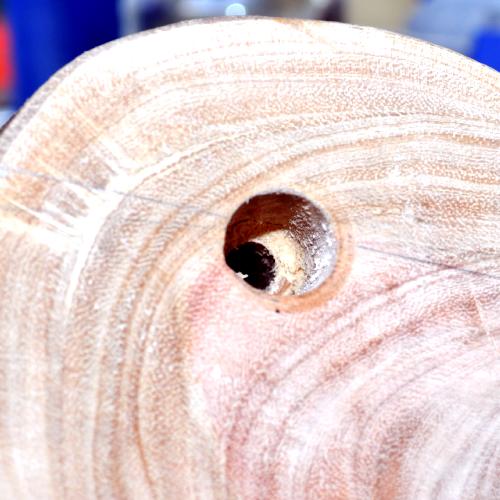
As the wood is an irregular shape I had to use a set square to measure and mark the point where the drill hole had to be made on both ends of the wood. Having the top and bottom parallel makes this job a lot easier.
After marking up, it was time to get the drill out. After drilling in from both ends, you should have a nice hole right through the middle of the wood. This stage is definitely where the old adage ‘measure twice, cut once’ comes in. If I had missed, I would pretty much have had to start over so I was very careful about getting the measurements right. |
 |
 |
The next step was to bore out the hole to make it big enough to fit the metal pole. I did this by just putting the pole over the hole in the wood and then just drawing around it. After marking it out I used a Dremel High speed tool to bore it out using a multipurpose cutter bit.
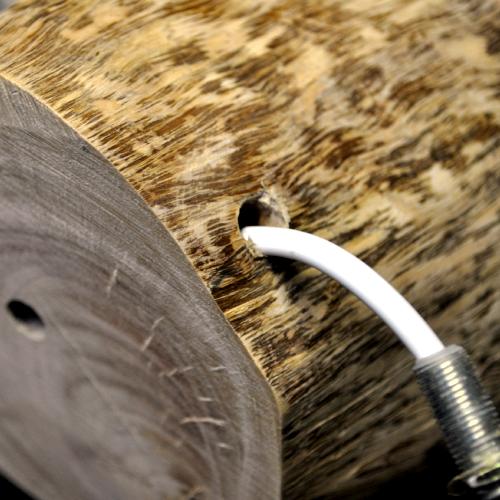
Once the hole had been prepared I used an angle grinder to cut the metal pole to length and tidied up the end using a grinding wheel with my Dremel. |
With the centre hole and metal stem complete, the next stage was to drill a hole from the side of the wood to meet the centre hole. This is to allow the lamp to sit flat with the cable coming out of its side. Again, measure and drill carefully so you do not miss the connection between the two holes. |
 |
 |
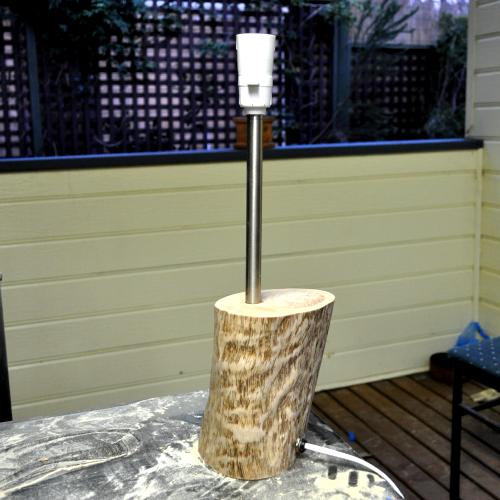
As all of the individual pieces were now complete it was time to put it all together. To do this, I had to thread the cable through the side hole until it was visible from the bottom of the piece. After this I used the handle of a paint brush to guide the cable up the shaft as I fed it through until it came out of the other end.
At this point I could then pull it through so that there was a bit of slack and I could reassemble and install the light fitting. After this I just had to fit and glue the metal stem into the base and make sure all the connections were tight. |
To finish off, I gave the base a couple of coats of varnish to protect the wood and added a new $10 lamp shade. That’s it, after the paint dried, my wife had a new lamp that is completely unique and cost next to nothing to make. |
 |


Current Comments
0 comments so far (post your own)