Home Wood Stone Other Ideas About Contact
Home > Stone

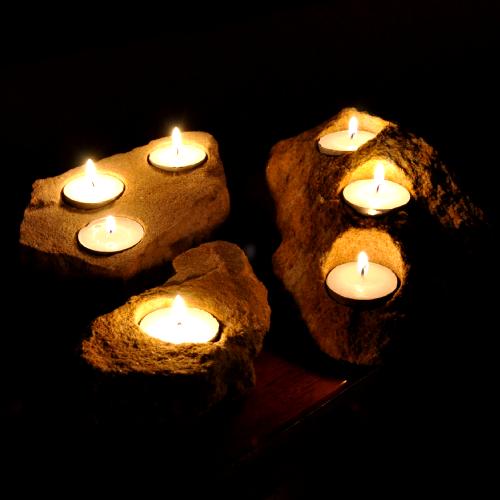
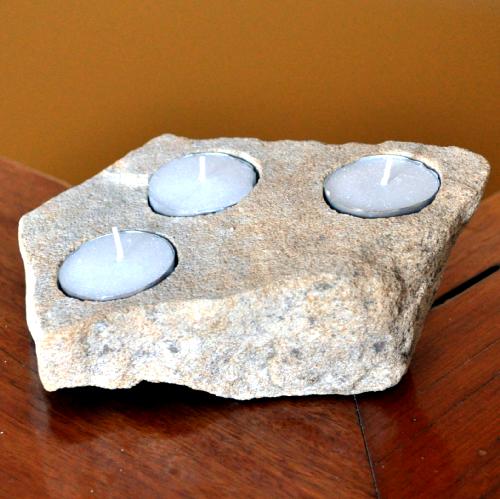
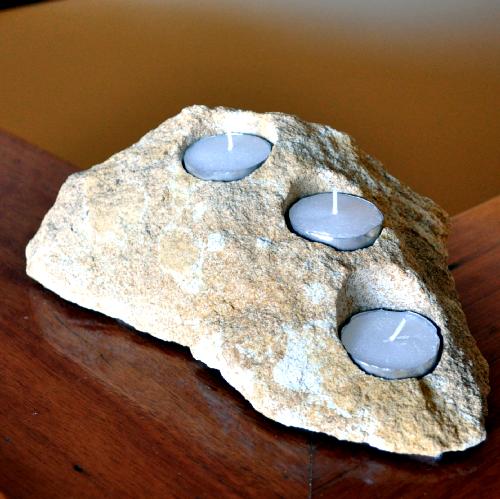
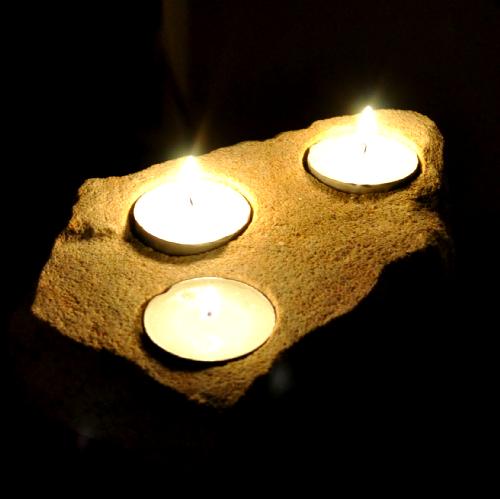
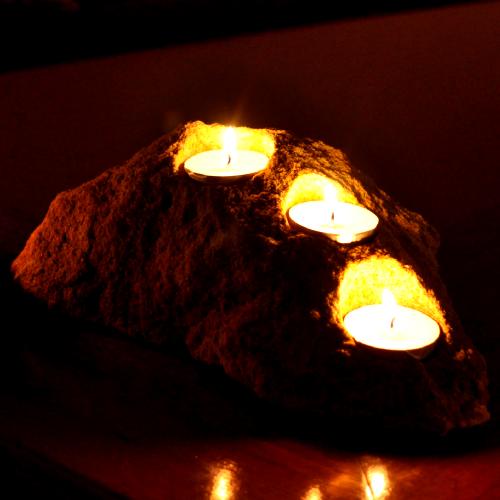
Three Piece Candle Holder Set

Carved Sandstone Candle Holders

Recently, my wife and I were invited to my brother’s wedding. Perfect, I love a good wedding and I’d say that this one was well overdue. So, what about the wedding present? Well, I really dislike wedding registers and it didn’t seem right to just buy something so I decided to go out on a limb and make them something really special and unique. This set of candle holders was my first attempt at making the gift.

If you're interested you can see the actual gift here.

Current Rating: 4.00
From: 3 votes
Rate it now

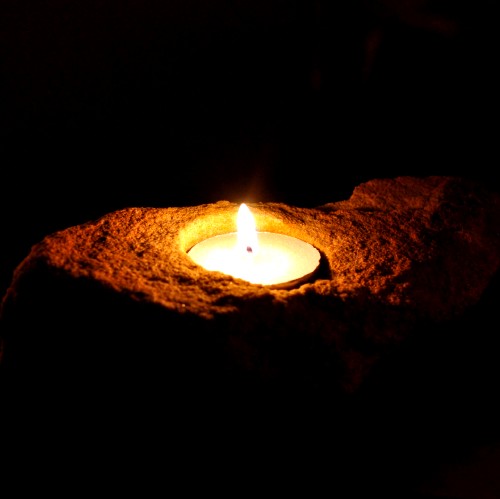
So, I had decided to make a set of candle holders, a set that could be used to add atmosphere to a room or as a table centrepiece when entertaining guests. For this kind of piece I decided fairly early on that it had to be light in colour and probably made out of stone.

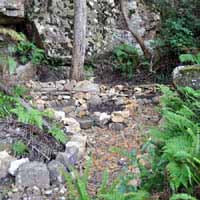
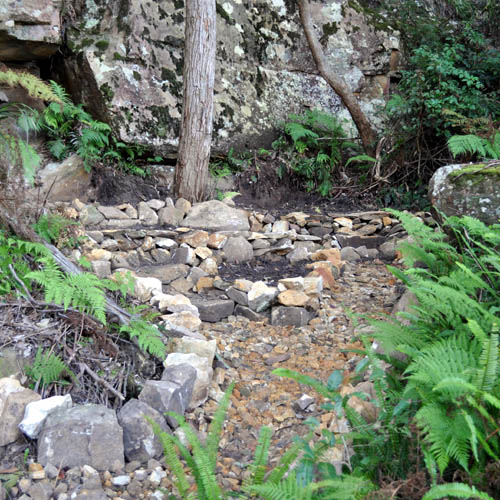
Fortunately, sandstone is something I am not short of. Living as we do on a hill that is effectively made of the stuff and is covered in large lumps of it, finding some materials to work with was as easy as getting out my sledge hammer and turning some of the bigger rocks into smaller ones. Fortunately I’d had plenty of experience doing this in the past while landscaping the garden.

Sandstone Landscaping in my Garden

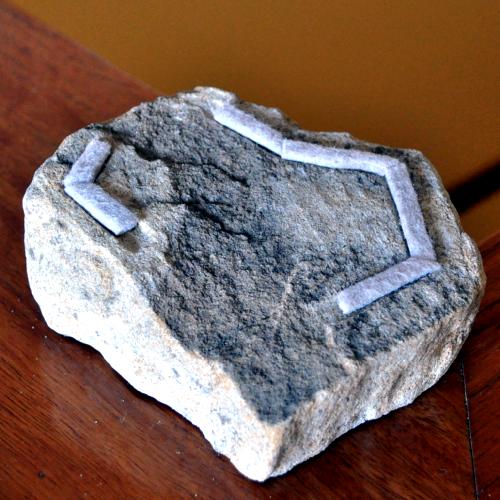
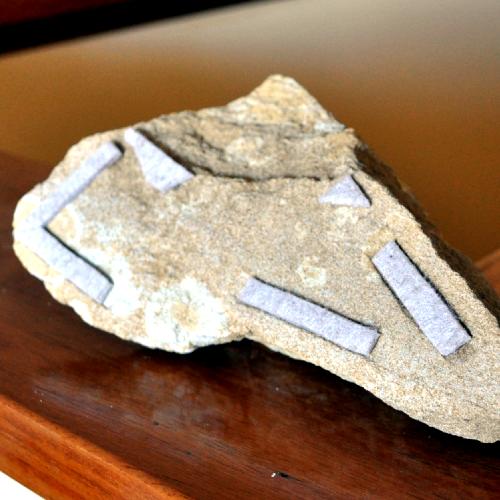
Once I had found a few nice pieces of stone, the process of figuring out how to carve it started. Here again I was a bit fortunate, a long time prior to trying to make this gift I had bought a whole load of different bits for my high speed rotary tool. For those not familiar with it, think dentist drill on steroids.

I had originally bought the bit packs because they contained a lot of sanding disks that I wanted to use on a wood working project I was working on. Within these bit packs were also a number of grinding bits that at the time I was wondering what I’d do with. As it turns out they were perfect for working with sandstone.

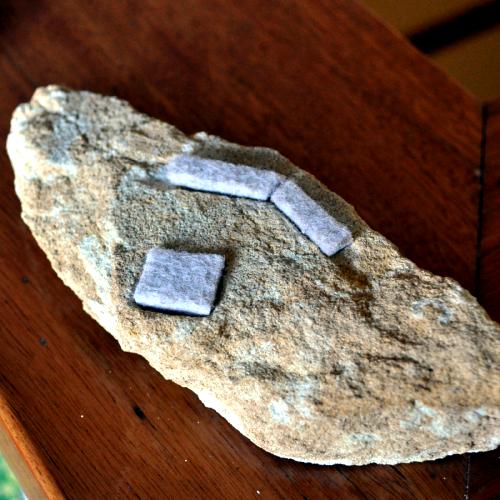
So, I now that I had everything in place it was time to start working on the pieces. I had decided on a set of three holders, all with a nice natural finish that could be used either together or on their own.  I would use normal tea light candles that you can get for a few cents each so that finding replacements wouldn’t be hard and I would have to make sure that the base of each pieces was protected so that the rock would not scratch any surfaces that it was put on.

As I was working with raw stone, the carving process was a little different for each piece however there were common milestones that had to be reached.

The Base

The first step was to select a side of the rock that would be its base. Once the base had been selected I then had to make sure the piece would sit flat and be stable. In some cases this required me to grind down sections of the stone, in others I was lucky and it just sat nicely on its own.

After this, the next step involves grinding a series of channels into the base of the rock so as to be able to inlay a layer of felt. The felt is needed to protect the surface the piece is sat on from potential scratches. I got the felt from a local hardware store in the floor protection section.

The channels should be carved around the outline of the rock surface to allow for maximum stability. Once you have the channels in place, you then need to cut the felt to shape before setting it aside.

The base of the first candle holder The base of the second candle holder The base of the third candle holder

The Top

Once the base is complete the next thing to do is to decide how many candles each piece will have on it. The determining factors are obviously the size and shape of the stone. In the three that I made, one piece was fit to hold one candle and the other two were big enough to hold three each.

After deciding how many candles to place on each piece, I used one of the candles as a template to mark the areas that needed grinding out. Next, I used the grinding bits I mentioned earlier to grind out the recesses for the candles and make sure that they were perfectly rounded with the edges vertically straight.

The top of the first candle holder The top of the second candle holder The top of the third candle holder

Finishing Off

After completing the grinding process, I next thoroughly washed each piece to remove all of the dust from the grinding process. Once completely dry, all that’s left to do is to stick the felt into the channels on the base before packing them into a nice box with plenty of bubble wrap and wait for the wedding.

In all I’d say that it probably took around an average of four hours each to complete the three pieces. I don’t think that’s too much time and effort to produce such a unique and special wedding gift. Overall, I’m very happy with the outcome and know that our friends will love the gift when we go off to their wedding.

The first candle holder The second candle holder The third candle holder

Current Comments

0 comments so far (post your own)

Leave your comment:

Name:

Email:

URL:

Comments:


Please answer the following:


Note: Emails are optional and will not be visible.
They will only be used to respond to posted questions.

No HTML code is allowed and URLs will be auto-linked after approval.

Home Wood Stone Other Ideas About Contact